When starting development of my indie game all alone, it was decided early that there needed to be visual sacrifices in order to complete the game in a timely manner. Many solo-developers and indie studies take this approach by going for low-poly models or a simplified graphical style overall. This helps speed up the development process, yes, but also often allows for the game to have a unique visual style!
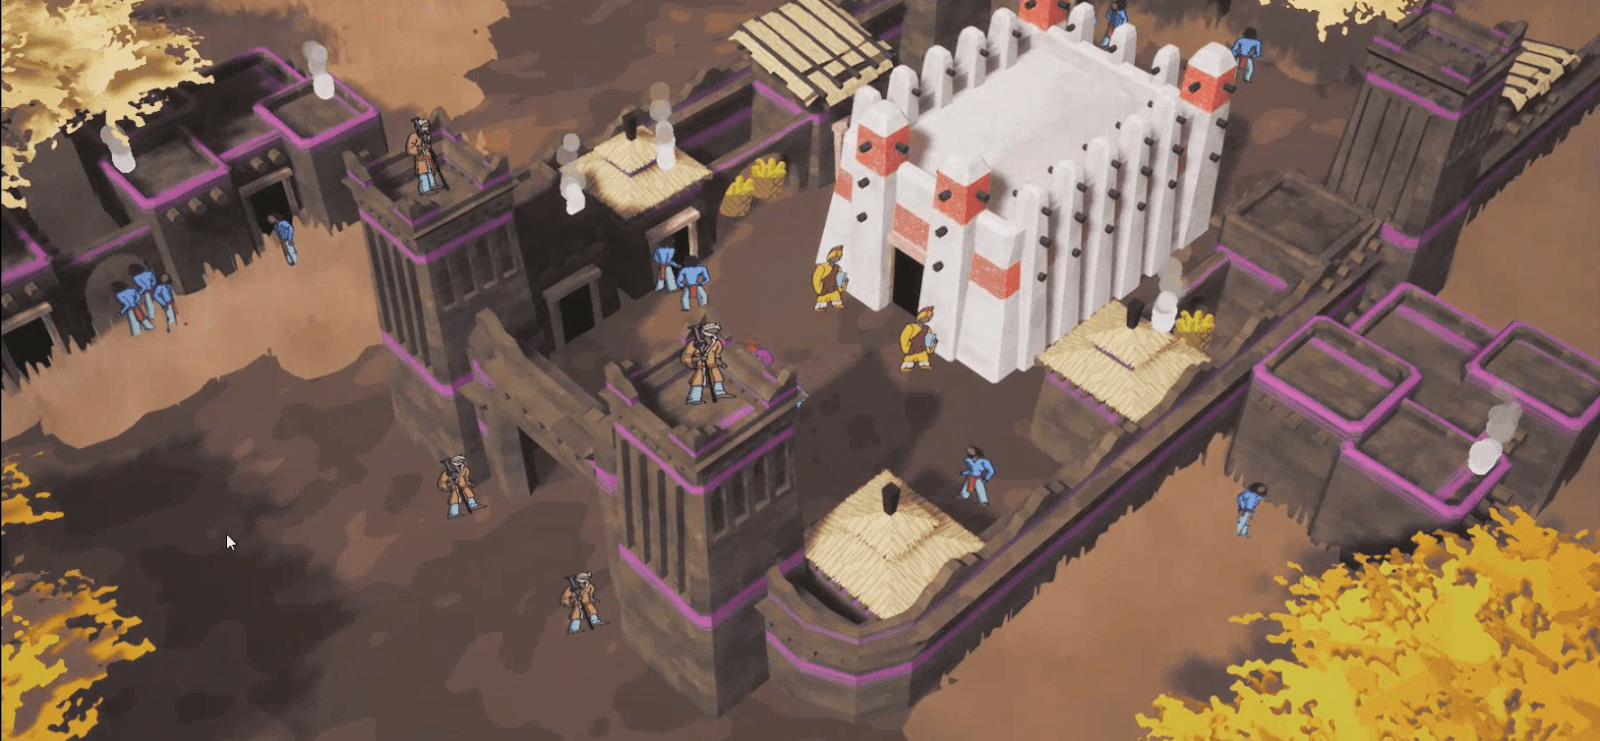
The look I went for in my game “Kainga” is to create a simple 3D world with 2D actors and items within it, heavily based off of the under-appreciated 1990s game Populous the Beginning. Feel free to see what I mean by that in this first look trailer of Kainga:
I like the look of 2D sprite based units running around the 3D world. There is a very goofy nostalgic look to it without being pixel art, and it’s really enjoyable, at least for me. Kainga is developed using Unreal Engine 4 and to accomplish this look is actually very counterproductive, as far as I can tell. 3D characters are easier and more streamlined but I stubbornly stuck with my plan (partly because I didn’t know how to animate, and partly because I wanted the game to have a more unique look) and I like how it turned out.
Sprites
I’m happy to break down exactly how I accomplished the look in the video above. Please keep in mind, as a solo developer with no official education, working only in blueprints, this may not be the best way to do things, just the way I did them.
First I drew every animation frame on a piece of paper, scanned them and recently re-drew them digitally.
Here is the difference.
These are just 4 frames of animation, so it looks clunky but it sticks to the “retro” feel, while also making the animation process quicker for me!
NOTE: For a while I got hung up on the fact that when the animation is playing, it looks like he’s walking backwards, then someone told me that means it’s actually done correctly and will look good when the character is moving. They were right!
The next step is having to draw the same animations for all possible angles your characters can face. In Kainga there are 8 angles for each sprite, and this seems to be the norm in isometric games like oldschool Starcraft and Diablo II (although you could potentially have just 4 or even more than 8). I named my angles off of the compass directions so below we have North-West, West, South-West, South, South-East, East, North-East and North, in that order.
1 standing and 4 running animations for 8 directions are already 40 sprites! Turns out 2D animation is a lot more tedious work than I thought. I set my animations to run at 8 frames per second, which works with the movement speed and choppy look I’m going for.
Direction
It’s time to set up the animations on actors themselves. There’s two things that need to happen here. First, the sprite has to be animated, and second, the sprite has to always face the player camera.
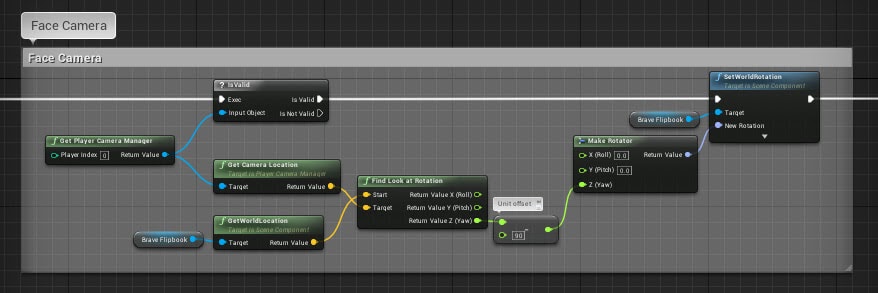
Billboard Components always face the camera, but since these sprites need to be animated, you cannot use a Billboard on your Character class (unless you put your animation in a material, which I didn’t know how to do when I started this), so I used the Flipbook component to run the animations. Flipbooks, though, don’t automatically face the camera like Billboards do. So I created a system that angles the flipbook to face the camera on tick.
NOTE: You can skip this part if your camera doesn’t rotate!
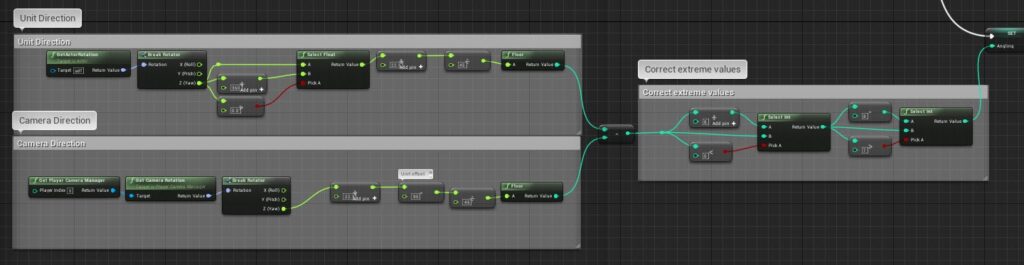
I simply find the angle between the character and the camera and then set that as the flipbook’s rotation (-90 degrees). I isolate only the Z angle (yaw) so that the characters still look like they’re standing on the ground when they’re in the corner of the screens.
Facing
After doing this you will find that the flipbook behaves now like a billboard, always facing the camera but the animation will not change based on what angle the character itself is facing.
To do this we need a bit more calculation.
I have 8 sprites each at their own increment of 45° (360° total ÷ 8) so I take the character’s rotation ÷ by 45 to get that character’s angle as an integer between 0 and 7 (Unreal Engine is 0 based so we begin at 0 instead of 1). I also add 22.5 (half of 45) to get the angle right (took trial and error to figure this out), as well as do a bit of hacky math to make sure the rotation stays between 0 and 360.
That is subtracted by the camera’s angle calculated in the same way to get the angle the character is facing in relation to the angle the camera is facing. I then do a quick check to make sure that number is between 0 and 7, otherwise the next part doesn’t work. I saved that number as an integer variable “angling” and used it later to choose the correct flipbook.
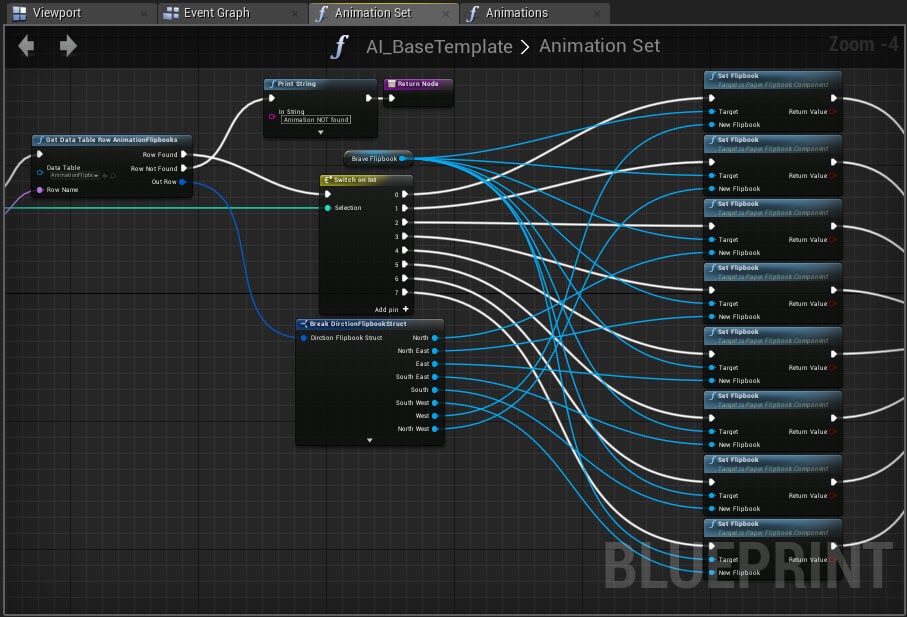
The Switch on Int is using our “angling” to set the flipbook to the right angle. It took a bit of tinkering to get this right but it’s pretty straight forward. Through testing I’ve found 0 = West, 1 = NorthWest, 2 = North, etc. Then you just place the correct flipbook and set it to our character’s flipbook component.
I made a call to a struct that has all 8 angles of each specific flipbook type so the flipbook can be changed easily for different units.
You can see above that the units face the same direction as the camera rotates around them. This is a small but necessary detail. One of those things you only notice when it’s missing.
It doesn’t look particularly impressive but it does the job and I like the look. The next step is to set up a state machine or system that chooses which animation to run based on conditions. I started with: if moving – use “Run” animation, otherwise – use “Stand” animation. Setting these up in a Data Table seems to help with organization quite well.
And that’s how I’ve made 2D characters able to run around in a 3D world and face the right way! As I said before, it may not be the best way, but it works for Kainga’s purposes!
Afterthoughts
I went back and forth in deciding where to draw the limit in terms of what was 2D and what was 3D. There was a moment when boats, trees and even the giant snails were 2D sprites, but it didn’t look good. I set a rule of only people, creatures smaller than people and items are 2D, everything else is simple 3D as shown below:
I plan to change the sprites of the worker units, because everyone keeps asking me why they’re wearing jeans! But I have drawn over 750 sprites so far (for multiple types of units), and changing them requires a lot of work. I also plan to add women to Kainga at some point, but this would instantly double the number of total character sprites, which is intimidating as it would take a ton of time. Kickstarter stretch goal, maybe?