Xiaomi is (rightly? ) one of the most popular China brands, especially your smartphones have been in the hype for years. That cannot be said of MIUI, Xiaomi’s Android interface. This is clearly designed for the Chinese market, both in terms of design and functionality.
Fortunately, there is usually a remedy in the form of custom roms. Even if you want to root your smartphone, you have to consider a few points. The first thing to do is to unlock the bootloader.
Attention! All data will be deleted during this process.
However, most of the guides on this are out of date as Xiaomi has changed the process. A text message or a reason for unblocking is no longer necessary and fortunately this makes the process easier.
Unlock bootloader
Unfortunately, Xiaomi doesn’t make it so easy for its own users to unlock the bootloader. After all, no more data is collected via MIUI and its own apps.
For this reason, you have to ask nicely before unlocking the bootloader. Fortunately, Xiaomi doesn’t get in the way of anyone here and every request is allowed. Unfortunately, you have to wait around 15 days before you can start with the right part.
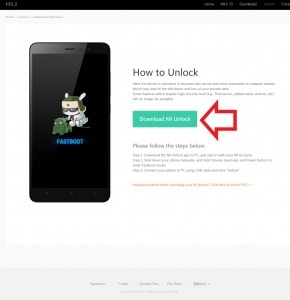
To unlock the bootloader, you have to use the official Xiaomi tool. You can download it here for free by pressing “Download Mi Unlock”.
2. Install Mi Flash Tool
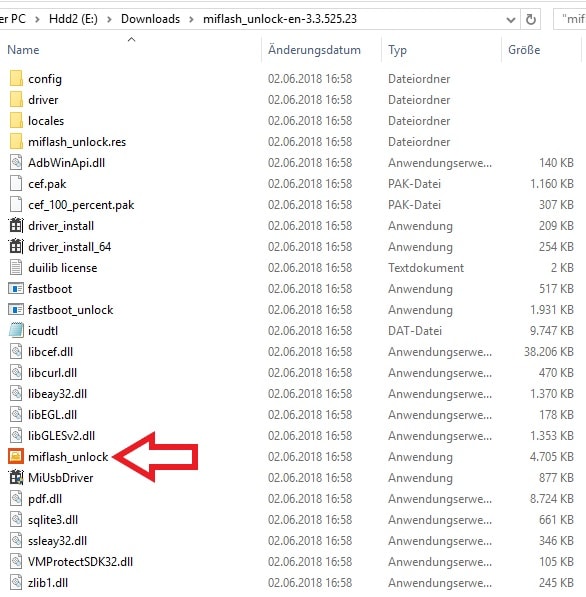
As soon as you have downloaded the file you have to unzip it and install the program by executing the unpacked “miflash_unlock” application. The tool then greets you with a disclaimer that you have to accept if you want to continue.
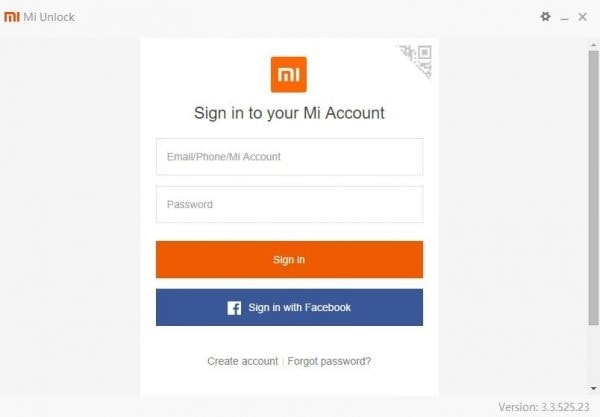
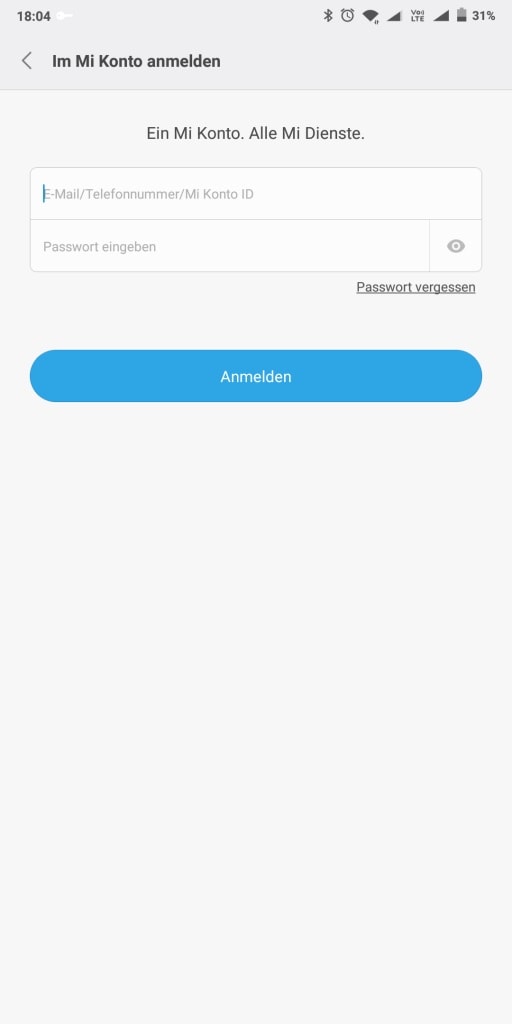
3. Connect Mi Account
Most Xiaomi users already have a Mi Account, but if this is your first device, you have to register or log in to continue.
Alternatively, you can log in via Facebook, provided you have no problems with Xiaomi reading data from your profile. If you enter a telephone number, it is best to use the SIM card that you will use later in the Xiaomi smartphone.
4. Activate developer options & connect devices
First, the developer options must be activated in the settings of your smartphone. To do this, simply call up the settings, switch to “My Device” and tap “MIUI Version” several times. You will then be notified that you are now a developer.
Don’t worry, you can’t go wrong with this step. So the MIUI version number (which will soon disappear) can be hammered happily!
Now go to the unlocked developer settings and navigate to the Mi Unlock Status menu item . Now it is only getting exciting and the MIUI liberation process can begin.
Now, of course, you have to log in again to synchronize the flash tool and your smartphone and ask again whether you are really really sure whether you want to take the “security risks”.
Simply enter your password, confirm it again and then it’s finally time to unlock the bootloader.
5. Install and unlock drivers
Now switch off your smartphone, then press the “Power” and “Volume down” buttons until you get into bootloader mode. Now connect your smartphone to your PC using the USB cable (which is best supplied).
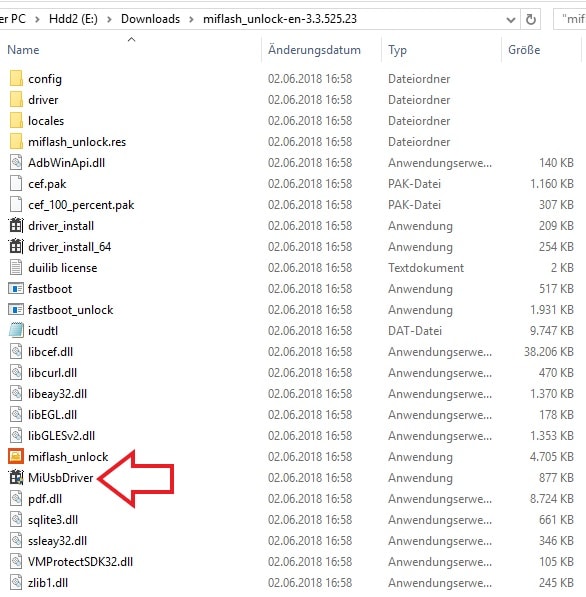
The appropriate drivers for Windows are included in the Mi Flash Tool for you. Unfortunately, MacOS users get nothing and have to trick a bit .
To do this, simply open the “MiUsbDriver” application and the drivers will install themselves. Then press Unlock in the Mi Unlock program and a few seconds later you should be ready and the Xiaomi smartphone finally has an unlocked bootloader.
In addition, it could be relevant for some of you that you can only unlock one bootloader per month per account in this way. This is a rule from Xiaomi to prevent abuse by shops with infected roms.
Once that is done, you can continue installing custom recovery.
Flash custom recovery
Let’s start with a little introduction to the subject. The recovery is a kind of mini operating system that runs on the device in its own partition independently of your actual smartphone operating system (usually an Android version such as MIUI, Lineage OS, etc.). In theory a very powerful tool, but in practice the manufacturers hardly offer any useful functions, let alone an option to install custom roms.
But of course there is a remedy with which you can implement backups, root access and your own operating system. Let’s go!
1. Install ADB, Fastboot and drivers
In the past, each part had to be installed individually, but XDA user Snoop05 has developed an all-in-one tool that installs the necessary files in a few seconds. The official thread of the XDA forum can be found here , but since the download links don’t work at the moment, I’ve picked one for the current version 1.4.3. You can find it here .
2. Download Team Win Recovery Project (TWRP)
The selection of custom recoveries has (unfortunately) become very easy. There used to be the Clockworkmod in addition to TWRP, but this was discontinued as a recovery. In this respect, the question no longer arises as to which recovery is preferred. The official and latest TWRP version for your smartphone is always the right choice. For Xiaomi smartphones you can find them here .
However, it can take up to a few months for a new device to be included in official support. There are also so many devices that some of them don’t even get any support. In this case it is best to either google the “name of the device” + “TWRP” or enter the device at XDA-Developers . If there is already a version, you will be able to find it and download it.
3. Flash TWRP on the Xiaomi phone
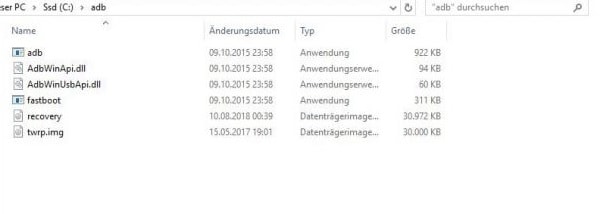
Next, rename the TWRP.img file you just downloaded (right-click) to “recovery” and copy it into the “adb” folder that was created in step 1.2. You can find it in Explorer under “C: \ adb”.
So far so good, let’s go to the smartphone.
As with “Unlock Bootloader”, turn off your Xiaomi smartphone and then turn it on again. Now hold the volume down button parallel to the power button until you are in fastboot mode. Now just connect the original cable to the PC and you can continue on the PC.
At this you have to open a Powershell or cmd.exe. But don’t worry, that sounds more complicated than it is. To do this, hold down the “Shift” key in the adb folder and click once with the right mouse button. If you’ve done everything correctly, it should look like this (for Windows 10):
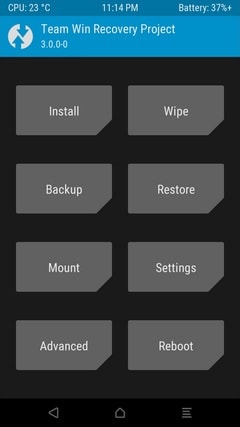
Then click on “Open PowerShell window here”, enter “fastboot flash recovery recovery.img” (also by copy & paste) and wait until it has finished. Now type in “fastboot reboot recovery” and TWRP should appear on your smartphone.
4. “Secure” the recovery
Xiaomi has allowed itself the fun of automatically reloading the old recovery on some devices after every restart of the system, so that you theoretically have to reinstall the TWRP every time you want to use it.
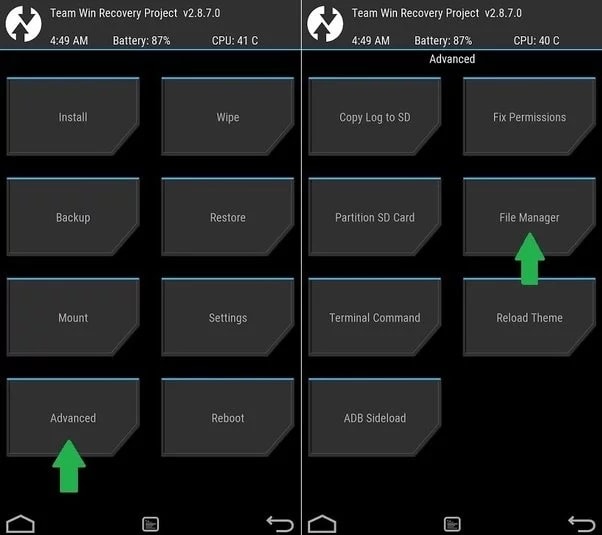
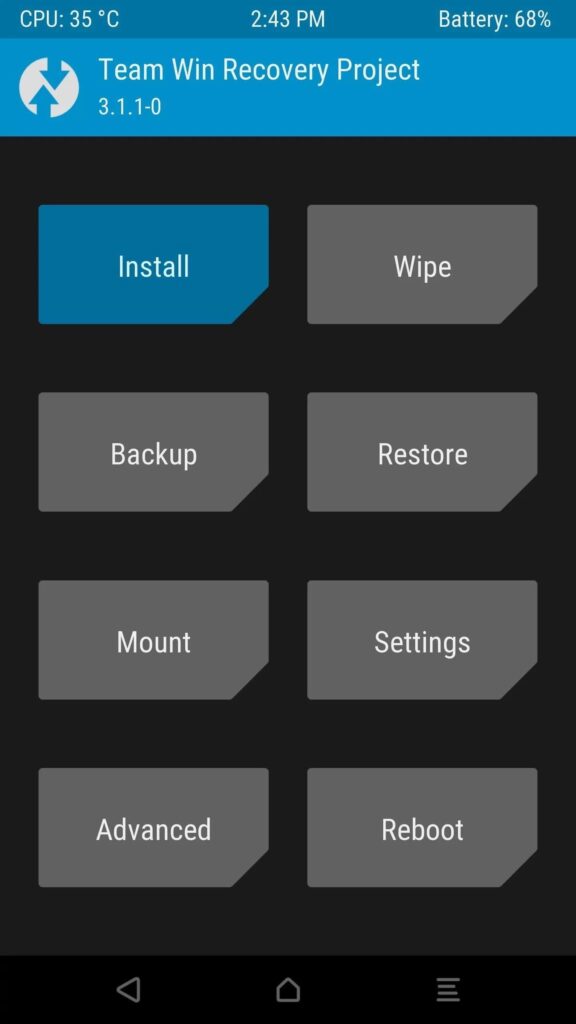
But there is also a solution for this. Go to TWRP on “Advanced” and then in the File Manager. In this you navigate to this location / system / bin /. There is a file called “install-recovery.sh”. You delete this, and the TWRP is retained.
Edit: This workaround does not seem to work on every device, sometimes even the Xiaomi recovery comes back to the smartphone (thanks to David for the hint)
Root Xiaomi smartphones
If you want root access for your Xiaomi smartphone, follow the next steps. If not, or you’re wondering what root is, you should go straight to the next step.
For everyone else, we get root access via Magisk, as SuperSU is no longer being continued, and the Magisk Manager can also be used to disguise root access so that Google Pay and Netflix are running again.
Important : If you want an alternative operating system, you have to flash it before rooting. In this case, install the Custom Rom first, and then go through the steps to root. However, if you want to root your current operating system, you can continue right here, and then you’re done with this guide. All right? Then let’s get started!
1. Flash Magisk.zip
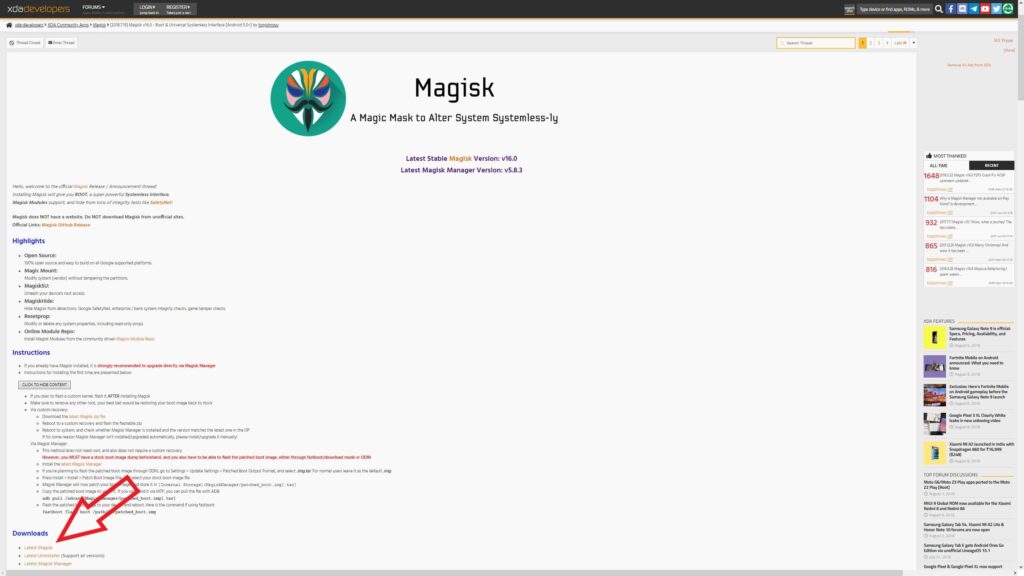
First we download the Magisk.Zip from this page and save it on the PC. If the smartphone is no longer in the TWRP, we boot into it (Power + Volume Up) and connect the Xiaomi smartphone to the PC with the original cable. Then we copy the downloaded Magisk Zip onto the smartphone.
Next we install this. If you have already flashed a Custom Rom, you already know the procedure .
In principle, that’s it, then you can restart the smartphone again. However, you can’t do anything with root, and it’s currently still potentially very dangerous. So now you have to …
2. Install Magisk Manager
Like the Magisk.Zip, you can get it from this XDA page , but you should download the .apk file directly on your smartphone for the sake of simplicity. Simply click on “Latest Magisk Manager” under “Downloads”, open the file and, if necessary, allow the installation from unknown sources, install the Magisk Manager and you’re done. You can now manage the root permissions directly in the app, just like the SafetyNet test, which is a prerequisite for Google Pay and Netflix.
Flash Custom Rom
1.Selecting the operating system (ROM)
Different Android versions are a dime a dozen, in principle each of you could create your own version with enough programming skills. But if you want a very special version, you probably know where to find it yourself, if there is an adapted version for the respective Xiaomi smartphone at all.
That’s why I’m focusing on three popular options: MIUI versions, Project Treble Roms and finally LineageOS. For all other systems you have to do your own research, that would go beyond the scope of the guide.
Important : You should urgently create a backup of your data on your smartphone, as you can easily delete the entire memory in the event of an error.
1. 1 MIUI
There are several MIUI versions. Not every Xiaomi device is recommended, and not every one is recommended, but there are good reasons for switching between the different versions. If you still have an unofficial (shop) rom that never gets updates and is possibly unstable / contaminated, you should change urgently.
For Europeans, the global Roms are of course the most recommendable. These support all languages and are relatively free of Chinese bloatware. However, there are not global, official MIUI roms for all devices. In this case you should stop by xiaomi.eu . They build modified MIUI Roms for a lot of Xiaomi devices, probably yours is also included.
For those who always want the latest, there are also betas. These can be more unstable, which means that some functions crash or don’t work in the first place, but you get a lot of new features. When writing this guide, for example, instead of my MIUI 9 version with Android 8, I could switch to MIUI 10 with Android 9 by installing the beta. You can usually find the latest versions of the beta at XDA .
1.2 Project Treble Rom
Since the introduction of Android 8, custom roms theoretically no longer have to be adapted to the individual devices. So once developed, you can run on any device that supports Project Treble! Sounds too good to be true?
In this case it is unfortunately too. On most devices, especially those from Xiaomi, almost no Treble Rom runs without problems. In addition, so far only a small part of the Xiaomi lineup supports Project Treble. Hopefully a lot will improve here in the future, currently Project Treble Roms are not recommended.
1.3 LineageOS
For the more experienced among you, LineageOS is the successor to the hugely popular cyanogenMod. This gives you the closest possible stock Android (as with the Pixel devices from Google), but without the Google Apps preinstalled. In addition, some devices are officially supported, but almost every one unofficially. This makes LineageOS the most popular alternative operating system for Android smartphones.
17 Xiaomi smartphones are currently officially supported, you can find them here .
If yours is not there, just search on Google or XDA, an unofficial version is actually available for all devices that have been on the market for a few months and Xiaomi has released the kernel.
1.4 Install Google Apps
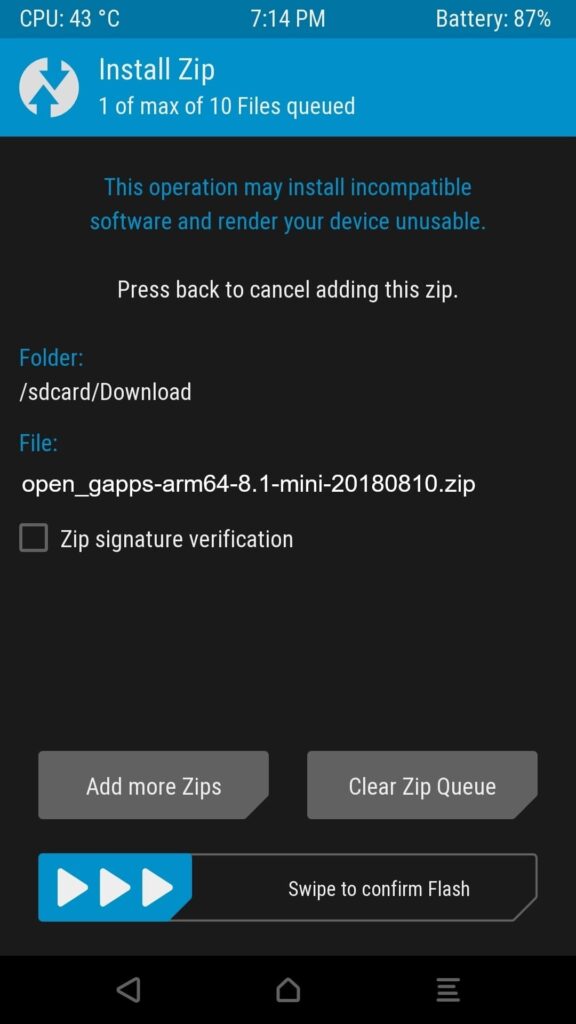
Some Roms do not have Google Apps preinstalled, for example the official LineageOS versions. Do you want to go to Playstore and co. You should still have a look at Opengapps . There you only have to select your architecture (mostly ARM64), the Android version and the scope of the Google apps and you can download them.
2. Flash of Rom
Once you have downloaded your preferred operating system and, if applicable, the gaps, you can finally start flashing. To do this, boot the Xiaomi smartphone into the recovery (TWRP).
Finished! That’s it”. Have fun with your new operating system or root!
Hi. I have 2 questions. 1. Is Magisk device-specific, i.e. do I need a certain version for a certain device? 2. I have already installed the Xiaomi.eu Rom … Can I simply install Magisk in addition or do I have to install the Xiaomi.eu again? Don’t want to set everything up again.
Hey 1. No, both the app and the Zip are universally the same for all devices. 2. If TWRP is still on your smartphone, you should be able to flash the Zip without losing any data. A wipe (deleting the data) is not necessary. However, you can wipe the cache and Dalvik to prevent compatibility problems. Then only the first start of the smartphone will take a little longer and the apps may reload the data from the cache, which takes a bit of time and data volume.
I hope I could help you with this, if you have any further questions, just ask.
Everything done as described. Recovery is ongoing. Reboot not possible, remains in the Xiaomi Fastboot / Boot loader. Boot loader is unlocked. The command fastboot reboot recovery – unknown recovery.
Hey That sounds like the TWRP wasn’t flashed. What happens if you press Power and Volume + at the same time while the smartphone is switched off until something appears on the display?
If you get into a Xiaomi recovery or nothing happens, you have to flash TWRP again. If you get into the TWRP, you can continue the tutorial. If you come to the fastboot, try it once with power and volume -.
If that doesn’t work, just write me your device name and a link to the TWRP version you used.


Hi.
I have 2 questions.
1. Is Magisk device-specific, i.e. do I need a certain version for a certain device?
2. I have already installed the Xiaomi.eu Rom … Can I simply
install Magisk in addition or do I have to install the Xiaomi.eu again?
Don’t want to set everything up again.
thank you
Hey
1. No, both the app and the Zip are universally the same for all devices.
2. If TWRP is still on your smartphone, you should be able to flash the Zip without losing any data. A wipe (deleting the data) is not necessary. However, you can wipe the cache and Dalvik to prevent compatibility problems. Then only the first start of the smartphone will take a little longer and the apps may reload the data from the cache, which takes a bit of time and data volume.
I hope I could help you with this, if you have any further questions, just ask.
Everything done as described. Recovery is ongoing. Reboot not possible, remains in the Xiaomi Fastboot / Boot loader. Boot loader is unlocked. The command fastboot reboot recovery – unknown recovery.
Hey
That sounds like the TWRP wasn’t flashed. What happens if you press Power and Volume + at the same time while the smartphone is switched off until something appears on the display?
If you get into a Xiaomi recovery or nothing happens, you have to flash TWRP again.
If you get into the TWRP, you can continue the tutorial.
If you come to the fastboot, try it once with power and volume -.
If that doesn’t work, just write me your device name and a link to the TWRP version you used.