How to add/Verify Your Website in Google Search Console
If you are really serious about your site or blog then you should implement Google Webmaster tools account. It is through Google webmaster tools that we can analyze that how search engine traffic comes to our site or blog. In this chapter, I will show you how to add or verify your site with Google webmaster tools.
Google Search console or Webmaster Tools is a partner of Google Analytics and a property of Google. The major difference between Google analytics and Google search console is that search console is more focused to the technical issues related to your website and Google analytic is more focused on providing in-depth traffic and visitor’s analysis of your website.
How to set up a Google Search Console account
If you do not have a Google account than do set up a Google account first. Once sign up with a Google account than visit http://www.google.com/webmasters/tools than sign in for Google Search Console with your Google account.

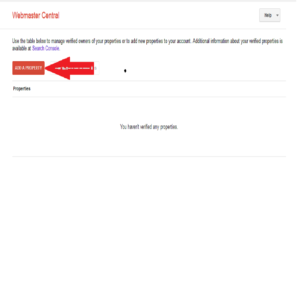
Now click on “Add Property” and enter the URL of your website.
Next you will be required to verify the website to the Google that it is yours. Here you will be having different options to verify your website.

In order to get your website verified you can use any of the methods mentioned there. The recommended method is uploading a Google file on your server. To get your website verified you need to follow the following steps:
Step 1: Visit to https://www.google.com/webmasters/tools and sign in using any of yours Google Account.
Step 2: Click the “Add Property” button and type in the URL of your website. Ex. http://delhitrainingcourses.com
Step 3: Choose “Upload an HTML File” option as a verification method in Google Search console dashboard. You may opt for other verifications methods as well.
Step 4: Now download the HTML verification file and click OK.
Step 5: Next you should upload the Google File using the file transfer protocols such as FileZilla or you can even use the Control panel of your website to upload the file on the server. You should upload the file in the main root folder.
Step 6: Now sign in to your webmaster Tools account and click the “Verify” button. Google will check the HTML file on your server and your site will be verified and you are now ready to use Google Search console account.
There are other options also available from which you can verify your website in the Google Webmaster tools. If for any reason you will be not able to verify your site using the above method. You can use any other method as mentioned below:
Domain Name Provider: Google will offer you the option of verifying your site through your domain name provider. Each domain provider has different way of verification. You just required to log into your domain provider’s account with Google accounts and your site will be verified.
TXT Records: You can also add a TXT record to your domain’s DNS setting by logging into your domain provider customer’s account. Google will provide you a unique record which you required to add as a TXT record in your domain panel. The TXT record can be found in the settings of domain.
CNAME Record: CNAME record can also be add the same way as one can add the TXT record in the domain customer’s panel provided by your domain name provider. . Google will provide you a unique record which you required to add as a CNAME record in your domain panel. The CNAME record can be found in the settings of domain.
HTML File Upload: HTML File upload method for verification is already mentioned above.
HTML Meta Tag: You can alternatively also verify your website by simple copy and paste of a Meta tag in your head section of your home page provided by the Google.
Google Analytics: To follow this method, you will need to use asynchronous tracking code . After receiving the tracking code, verify your website with Google Analytics.
Google Tag Manager: To follow this step, you will be required to use the container snippet. You must have the “manager” permission for the Tag Manager container.


