For many years I use to publish content on my blog using WordPress. I longer like to do that as I believe that WordPress is a great platform for content management. But there is negative side of this as well. And what I mean by that is that it’s said that 1 out of every 10 websites are now powered by WordPress. To me, that makes me feel like my site could be subjected to threats. WordPress as it is a open source can be hacked easily if we did not apply proper security measures. Secondly, over the years, WordPress — once a very simple and basic application — has become very bloated and inefficient.
What I mean by that is that WordPress can no longer be installed on an old system dug out of the garbage. This goes against my moral computing value system. I do not like new computers. I do not like how they are built. I do not like the lack of quality and craftsmanship that go into assembling them. And I don’t like how the money spent on new systems go to China.
Table of Contents
What is .XML Sitemap?
.XML Sitemap makes every URL or internal link of your website or blog noticeable to search engines. It usually contains every link of your website or blog and then submit it to Google Webmaster tools. We send notification to Google about the links of our website through .XML sitemap and thus Google index all of the links of our website through a sitemap. An example of a .xml sitemap can be: /sitemap.xml
At any rate, perhaps that’s a rant to post another day. In the mean time, I want to show you how to quickly and easily create a sitemap.xml file from scratch and how to submit sitemap into Google, as well as other search engines that use them. But really, all that matters is Google. So, I’ll let you figure out the latter. So that said, this tutorial applies to webmasters who still create websites the old school way… manually and with static html or php files. If that’s you, then continue on.
Sitemap.xml Skeleton Structure
Creating a sitemap.xml file is very easy. Submitting it into Google is easier. The trick is remembering to manually update it as you produce new pages. Over time I will eventually post a new tutorial on how to create a sitemap.xml file and have it update automatically as new pages are produced. But, for the time being, WYSIWYG. So, here’s the skeleton and from there all you have to do is add the URLs. It’s as simple as that:
<?xml version=”1.0″ encoding=”UTF-8″?>
<urlset
xmlns=”http://www.google.com/schemas/sitemap/0.84″
xmlns:xsi=”http://www.w3.org/2001/XMLSchema-instance”
xsi:schemaLocation=”http://www.google.com/schemas/sitemap/0.84
http://www.google.com/schemas/sitemap/0.84/sitemap.xsd”>
<url>
<loc>http://yourname.com/</loc>
<priority>0.75</priority>
<changefreq>daily</changefreq>
</url>
<url>
<loc>http://yourname.com/page01.php</loc>
<priority>0.50</priority>
<changefreq>weekly</changefreq>
</url>
<url>
<loc>http://yourname.com/page02.php</loc>
<priority>0.50</priority>
<changefreq>weekly</changefreq>
</url>
</urlset>
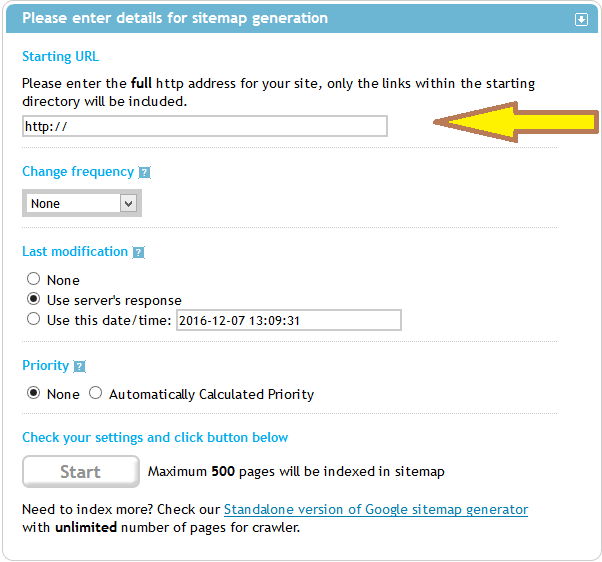
You can even generate .xml sitemap from https://www.xml-sitemaps.com/ . For those who are using wordpress can download the wordpress xml sitemap plugin from here: https://wordpress.org/plugins/google-sitemap-generator/
Submitting .XML Sitemap to Google Webmaster Tools
The last part is to submit your sitemap.xml file into Google via Google Webmaster Tools.
The process is very easy. Simply login to Google Webmaster Tools. It goes without saying that your site needs to already be registered and validated. Learn Google Webmaster tutorial about how you can verify and validate your website or blog. From there, click the sitemap tab found towards the bottom of the left sidebar. From there, before submitting your sitemap, you should test it using the test tool provided by Google. If it passes, then proceed to submit the sitemap and then you’re done!
Once again, the only challenge is remembering to manually update your sitemap.xml file as you produce more pages. Also, there’s no need to resubmit the sitemap in Google. Crawlers will periodically check for updates automatically. If you have any questions or need help, feel free to leave a comment below.


